Elvas Tower: Animated river - Elvas Tower

Jump to content

  • 4 Pages +
  • 1
  • 2
  • 3
  • Last »
  • You cannot start a new topic
  • You cannot reply to this topic

Animated river A way to make water move in Openrails Rate Topic: -----

#1 User is offline   mrmosky 

  • Foreman Of Engines
  • Group: Posts: Contributing Member
  • Posts: 811
  • Joined: 02-October 16
  • Gender:Male
  • Location:Chasetown
  • Simulator:Openrails
  • Country:

Posted 30 July 2017 - 08:03 AM

This is something that I have been playing with. It uses existing features in Openrails, and TSRE to make water move.
To start off with, here is a screenshot and a video.
Attached Image: river1.JPG


Video:
https://youtu.be/CT05mqTxPtg

The water looks better in the sim than in the video. Note the shadows of the trees on the water.
I have been asked to share the method I used, which I am happy to do. I wil upload the TSM source file for anyone who would like to experiment further.

So in the subsequent posts, the steps will be explained.

Geoff

#2 User is offline   thegrindre 

  • Member, Board of Directors
  • Group: Posts: Elite Member
  • Posts: 8,349
  • Joined: 10-September 08
  • Gender:Male
  • Location:Now in central Arkansas
  • Simulator:MSTS & Trainz '04 & Open Rails
  • Country:

Posted 30 July 2017 - 02:54 PM

http://www.elvastower.com/forums/public/style_emoticons/default/jawdrop2.gif Super coooool. Ya gotta love it. http://www.elvastower.com/forums/public/style_emoticons/default/sign_rockon.gif

http://www.elvastower.com/forums/public/style_emoticons/default/oldstry.gif

#3 User is offline   mrmosky 

  • Foreman Of Engines
  • Group: Posts: Contributing Member
  • Posts: 811
  • Joined: 02-October 16
  • Gender:Male
  • Location:Chasetown
  • Simulator:Openrails
  • Country:

Posted 31 July 2017 - 07:42 AM

Firstly, in TSRE open up the route you want to use.

Then select the ruler in the TSRE tools section under the objects tool. Select place new and put the first marker at the start of the river.
Press T and then left click the mouse at the next position for the river, the second marker will show, joined to the first. Then click at the next position for the river and so on. You can create bends in this way and go as far as you wish. For a trial, though just draw a failrly short marker path. The river should be on a flat and even surface.

After one click it will look like this:
Attached Image: Step2_ruler.JPG

and after a few clicks it should look like this:

Attached Image: Step3_ruler.JPG

Next, you should look at the left side were there is a panel for the attributes of the ruler. Click on create road paths, and the ruler will look like this:
Attached Image: Step4_road paths.JPG

Finally, in the right hand objects panel, in rthe ref.file box, you should find a section for vehicles, and in there should be carspawner. Select place new and add a carspawner to the path you have just created. The carspawner will be tiny at the position on the path where you clicked. On the left hand panel, there is a button on the left panel marked expand. Click this and the carspawner will expand to the size of your path. Now it should look like this:
Attached Image: Step5_carspawner.JPG

Save the route and exit TSRE for the moment.

#4 User is offline   mrmosky 

  • Foreman Of Engines
  • Group: Posts: Contributing Member
  • Posts: 811
  • Joined: 02-October 16
  • Gender:Male
  • Location:Chasetown
  • Simulator:Openrails
  • Country:

Posted 31 July 2017 - 08:04 AM

If you downloaded the file I uploaded (called Moving river), http://www.elvastowe...2-moving-river/

you will see that there is a Shapes file and a Textures file that you can add to your route in the normal way. The shape is just a flat surface with 16 polys.

Then you should also find a folder named Openrails, this should also be added to the top level of your route. It contains a carspawn file with the list of multiple carspawners for use with OR. This will not work with MSTS since you are only allowed one carspawner in that sim.

For reference the contents look like this:

SIMISA@@@@@@@@@@JINX0v1t______
3
CarSpawnerList(
ListName ( "List1" )
1
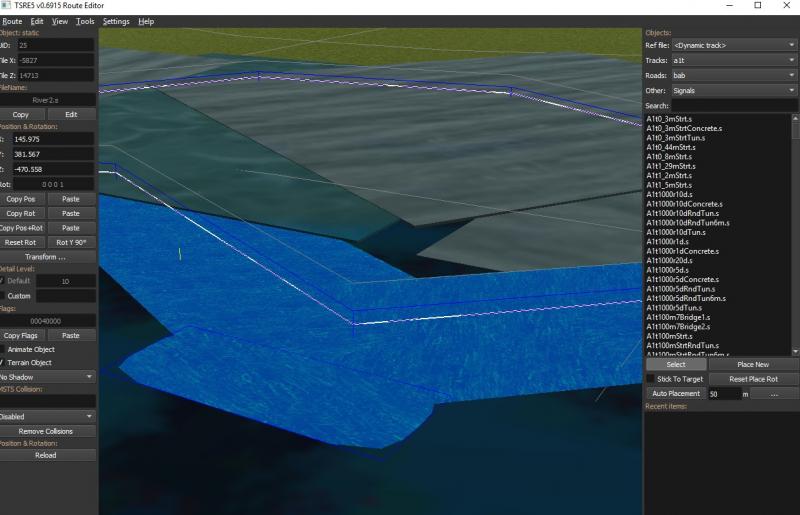
CarSpawnerItem( "River2.s" 0.5)
)
CarSpawnerList(
ListName ( "List2" )
1
CarSpawnerItem( "jp1car01.s" 12 )

)
CarSpawnerList(
ListName ( "List3" )
1
CarSpawnerItem( "jp1car01.s" 6 )

)

You can see that there are three carspawner lists defined. List1 is the one we will be using for the river. each carspawner can have a different set of "vehicles" and you can add as many entries as you like. The number after the shape identification ("River2.s" 0.5) so 0.5, is the space to leave between vehicles so they don't crash into each other. We want the river sections to crash, so I chose 0.5 for this. If you choose a bigger number, there will be gaps in the river.
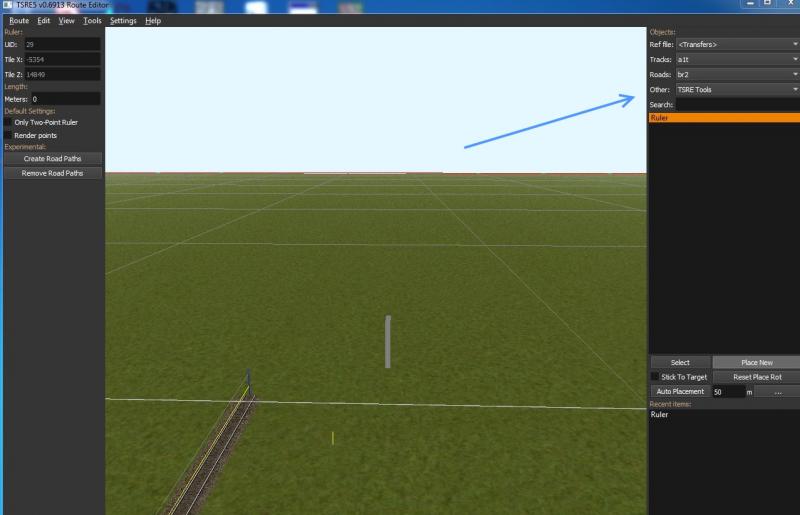
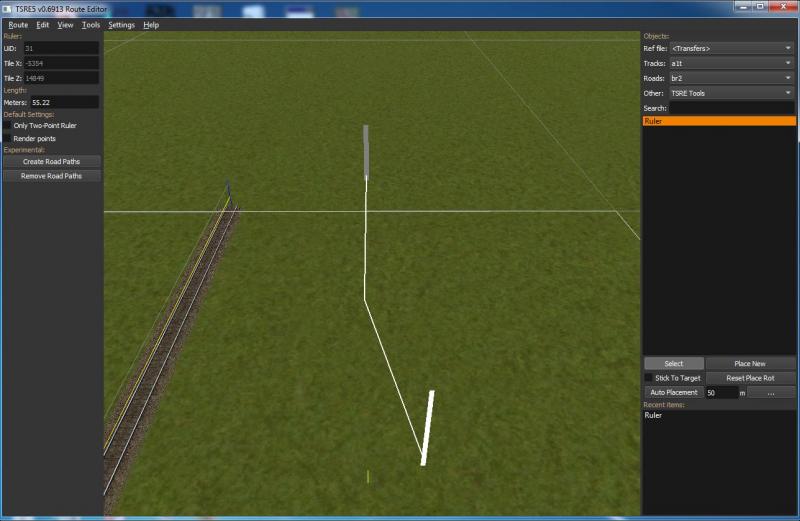
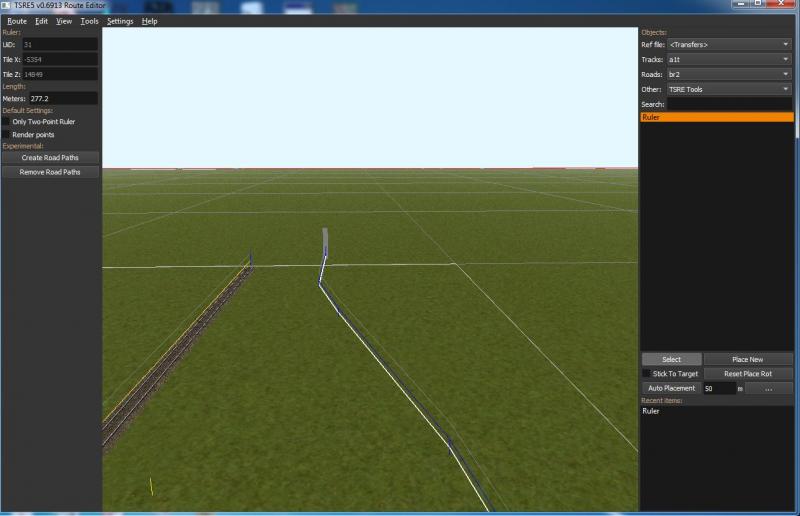
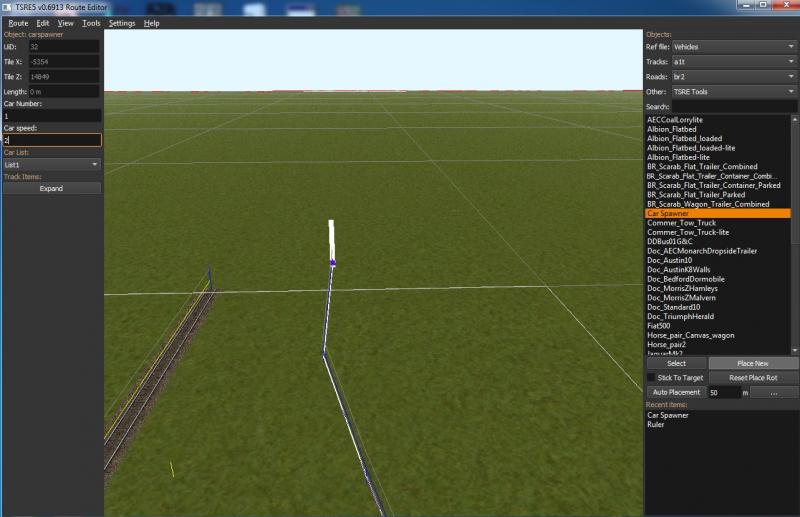
So re-open the route editor TSRE and select one end of the carspawner. This will bring up the properties as we saw before. The car list box will be set to "default", press it and the list of carspawners should appear. if they don't then the Openrails folder is probably not at the correct location. if they do appear, choose "list1 for this carspawner. the boxes above allow you to set car speed, and frequency of appearing (car number). Set car number to 1 and car speed to 2.

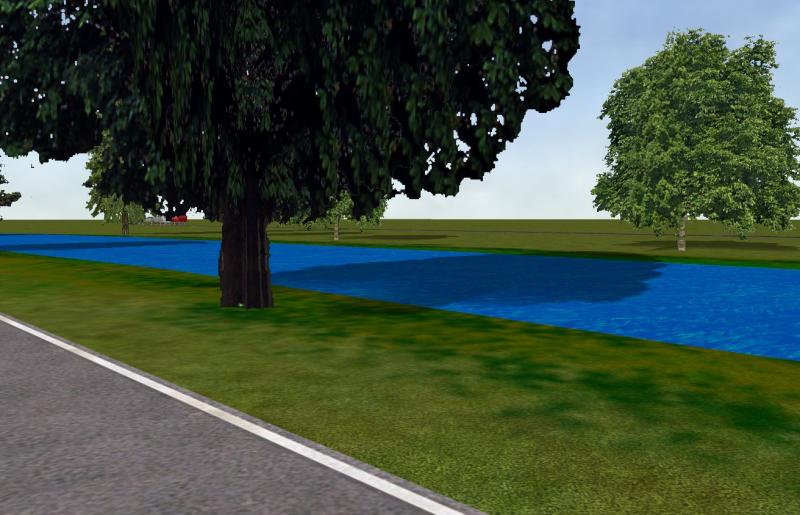
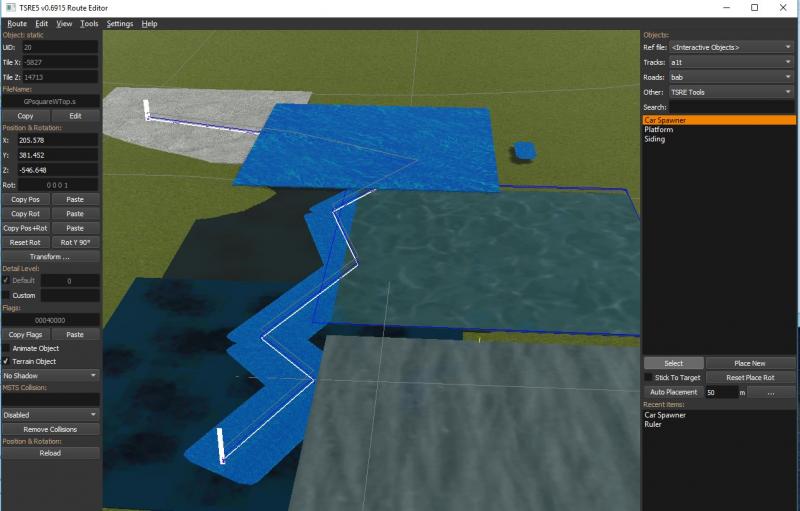
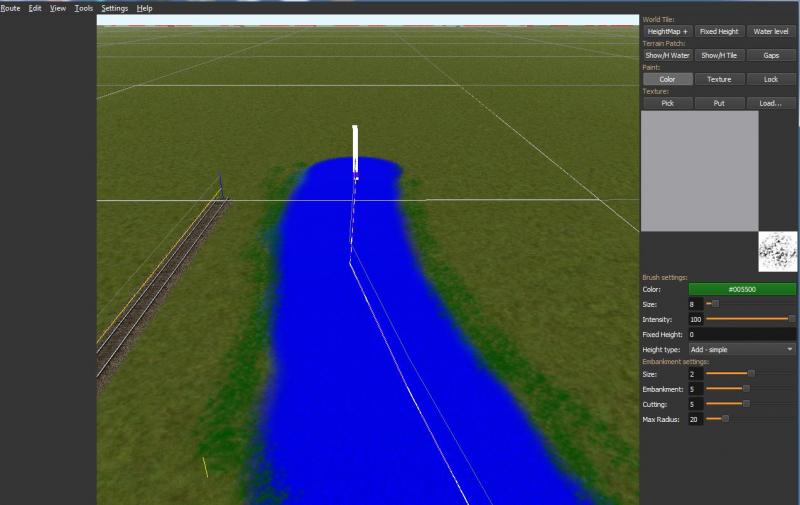
You can now save the route and try it in Openrails. You will see that the river starts to "fill up" from one end. It takes a time to get all the way to the other end, and this is why it may be a good idea to have a short river section, say between 2 bridges, then another one and so on.

I painted the river bed in my route, and you can add a river bank and trees etc if you wish. This will come in handy for the next thing to try.
Attached Image: Step6_paint river.JPG

Geoff

#5 User is offline   Csantucci 

  • Member, Board of Directors
  • Group: Posts: Elite Member
  • Posts: 7,443
  • Joined: 31-December 11
  • Gender:Male
  • Country:

Posted 31 July 2017 - 09:40 AM

Sorry Geoff,
where did you upload the "Moving river" shape?

#6 User is offline   Garry 

  • Fireman
  • Group: Posts: Active Member
  • Posts: 117
  • Joined: 09-March 15
  • Gender:Male
  • Simulator:Open Rails + TSRE5
  • Country:

Posted 31 July 2017 - 10:03 AM

Hi Geoff
This looks really good and I will soon be in a position to start laying a river in my route. I have been placing the retaining walls for the banks today.
If I were doing a river in MSTS I would set the ground below water level, perhaps 5 metres. Should I do this for your river solution, or should I set the ground at river water level?
Garry

#7 User is offline   mrmosky 

  • Foreman Of Engines
  • Group: Posts: Contributing Member
  • Posts: 811
  • Joined: 02-October 16
  • Gender:Male
  • Location:Chasetown
  • Simulator:Openrails
  • Country:

Posted 31 July 2017 - 10:25 AM

Ok, so here's something else to try.

If you open TSM and load up the file that I downloaded, you can see that the shape is just a rounded off rectangle. The texture is one that I downloaded from the internet, so you can substitute others to get a different colour if you wish.

You can easily get a slightly different effect by changing the material type of the river. Click F2 and this will bring up the properties of the part. Set the material to be Alpha, and this makes the river semi transparent, as I prepared the texture this way.
Save the model and export to MSTS format into the route you have been using. You should notice that the appearance of the water has changed in OR. the river bed can sometimes be seen through the water.
It may now look something like this:


https://youtu.be/4Ef5-Jb5gxc

keep trying different settings to see what happens. That's what i am doing.

Cheers, Geoff

#8 User is offline   mrmosky 

  • Foreman Of Engines
  • Group: Posts: Contributing Member
  • Posts: 811
  • Joined: 02-October 16
  • Gender:Male
  • Location:Chasetown
  • Simulator:Openrails
  • Country:

Posted 31 July 2017 - 10:30 AM

 Csantucci, on 31 July 2017 - 09:40 AM, said:

Sorry Geoff,
where did you upload the "Moving river" shape?


Sorry, only just read your post

http://www.elvastowe...2-moving-river/

Added the link above too.

Cheers,
Geoff

#9 User is offline   mrmosky 

  • Foreman Of Engines
  • Group: Posts: Contributing Member
  • Posts: 811
  • Joined: 02-October 16
  • Gender:Male
  • Location:Chasetown
  • Simulator:Openrails
  • Country:

Posted 31 July 2017 - 10:32 AM

 Garry, on 31 July 2017 - 10:03 AM, said:

Hi Geoff
This looks really good and I will soon be in a position to start laying a river in my route. I have been placing the retaining walls for the banks today.
If I were doing a river in MSTS I would set the ground below water level, perhaps 5 metres. Should I do this for your river solution, or should I set the ground at river water level?
Garry


Hi Garry,

I set it on the surface of the ground, but try it and see if it works like that for you.

Geoff

#10 User is offline   Garry 

  • Fireman
  • Group: Posts: Active Member
  • Posts: 117
  • Joined: 09-March 15
  • Gender:Male
  • Simulator:Open Rails + TSRE5
  • Country:

Posted 03 August 2017 - 03:15 AM

Hi Geoff
I have downloaded your file and instructions, and I am enjoying playing with the river.
Thanks
Garry

#11 User is offline   Garry 

  • Fireman
  • Group: Posts: Active Member
  • Posts: 117
  • Joined: 09-March 15
  • Gender:Male
  • Simulator:Open Rails + TSRE5
  • Country:

Posted 03 August 2017 - 05:50 AM

The objects shown in the image are all copies of a 100 metre square, the original is the light grey one. I have copied it and reskinned it with several water textures from my "Envfiles".

What I am trying to do has partially worked.
I have succeeded in getting a river to flow over the surface of an object. I think that if I make the base layer and the river the same texture it will avoid the delay waiting for the river to fill up.

Then I would like to cover the river with a semi transparent layer allowing the movement to show through. This has not gone at all to plan.
The 2 squares that cover the river are from upper layers in the water environment and from reading Michael Vone's guide they should be semi transparent.
I have looked at the .s file for the square and the env file for water and notice that the line:
named_shader ( TexDiff ) might be different in the env file and in River2.s. Changing "TexDiff" to "BlendATex" or "BlendATexDiff" does change the transparency. It makes the squares invisible.

Any help with this would be appreciated.
Garry

Attached thumbnail(s)

  • Attached Image: RiverTextures.jpg


#12 User is offline   mrmosky 

  • Foreman Of Engines
  • Group: Posts: Contributing Member
  • Posts: 811
  • Joined: 02-October 16
  • Gender:Male
  • Location:Chasetown
  • Simulator:Openrails
  • Country:

Posted 03 August 2017 - 08:09 AM

Hi Garry,

It would be interesting to try putting one of the river2 components as the overlay to see if that works. The river2 shape is semi-transparent. You should already have the shape and textures in the right place, so you would need to add an entry in the route's ref file. Something like this would work.


Static (
Class ( "River" )
Filename ( "River2.s" )
Align ( None )
Description ( "River2" )
)

Geoff

#13 User is offline   Garry 

  • Fireman
  • Group: Posts: Active Member
  • Posts: 117
  • Joined: 09-March 15
  • Gender:Male
  • Simulator:Open Rails + TSRE5
  • Country:

Posted 03 August 2017 - 08:41 AM

Hi Geoff
River2.s as an object is in the foreground left, covering the river and part of the base square. It does not have any transparency that I can see. In the background is a river of 100 metre squares. I tried copying your river2.s as river3 and changing the texture to the one you can see, but it was invisible even when I changed the TexDiff entry.

I don't like my big squares, when they overlap they flicker too much. I will try them later with a smaller size, but the problem is that the river I want to fill is 60 metres wide and about 1500 metres long, and it is right beside the track.

Garry

Attached thumbnail(s)

  • Attached Image: RiverTextures2.jpg


#14 User is offline   SP 0-6-0 

  • Foreman Of Engines
  • Group: Posts: Contributing Member
  • Posts: 985
  • Joined: 12-November 05
  • Gender:Not Telling
  • Location:Another planet.
  • Simulator:MSTS/ORTS
  • Country:

Posted 03 August 2017 - 09:19 AM

Thats pretty cool. Although would it not be easier to code ORTS for moving rivers?

Robert

#15 User is offline   ebnertra000 

  • Superintendant
  • Group: Posts: Elite Member
  • Posts: 1,258
  • Joined: 27-February 17
  • Gender:Male
  • Location:East-Central Minnesota
  • Simulator:OR/TSRE
  • Country:

Posted 03 August 2017 - 12:07 PM

View PostSP 0-6-0, on 03 August 2017 - 09:19 AM, said:

Thats pretty cool. Although would it not be easier to code ORTS for moving rivers?

Robert


Maybe, but how do you determine which direction the water flows, especially if it meanders a bunch, as many are? It would be cool, but it could be tricky

  • 4 Pages +
  • 1
  • 2
  • 3
  • Last »
  • You cannot start a new topic
  • You cannot reply to this topic

1 User(s) are reading this topic
0 members, 1 guests, 0 anonymous users