 Log In
 Register Now!
 Help
Help

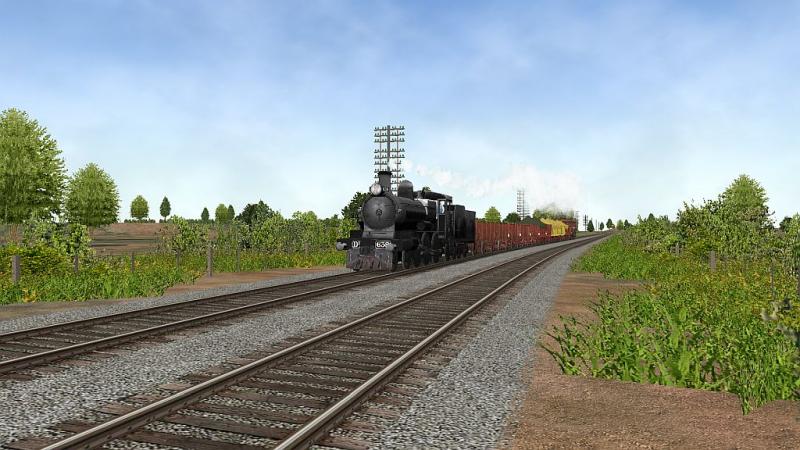
This isn't bad after adjusting the texture and working it into the landscape.
https://i.imgur.com/ZRpk7pc.jpg
Very Short Line RR
Pictures from somewhere in the Mid West.
Rate Topic:
 5 Votes
#11

- Vice President
-
- Group: Posts: Elite Member
- Posts: 2,225
- Joined: 19-December 09
- Gender:Male
- Location:South of here
- Simulator:ORMG
-
Country:

Posted 30 September 2021 - 05:31 PM
#12
- Vice President
-
- Group: Posts: Elite Member
- Posts: 2,225
- Joined: 19-December 09
- Gender:Male
- Location:South of here
- Simulator:ORMG
-
Country:
Posted 02 October 2021 - 05:25 AM
The crews really like the new locomotive from the Brunner shops.
https://i.imgur.com/O1LXVw7.jpg
https://i.imgur.com/O1LXVw7.jpg
#13
- Executive Vice President
-

- Group: Status: First Class
- Posts: 3,187
- Joined: 06-July 09
- Gender:Male
- Location:Downeast Maine (soon)
- Simulator:ORTS
-
Country:
Posted 02 October 2021 - 06:44 AM
Hi Randy,
She looks right at home. Nice work.
I don’t know what you use to paint or skill level - although judging from your route they look pretty darn good.
Are you familiar with layer types? When painting on logos and such - using a soft or hard light layer type allows you to see the underlying imperfections through the logo.
Also - if you look closely at my Rutland logo - what I did is select the logo - then expand the selection - then feather the selection - then flood fill with black. Then select the original logo and delete the black directly below it. This leaves you with a feathered black halo around the original logo. Adjust to taste. To me - it gives the logo the appearance of a physical presence on the surface and gives it some pop.
Just my two cents on some tricks I’ve picked up over the years.
Regards,
Scott
#14
- Executive Vice President
-
- Group: Status: First Class
- Posts: 3,187
- Joined: 06-July 09
- Gender:Male
- Location:Downeast Maine (soon)
- Simulator:ORTS
-
Country:
Posted 02 October 2021 - 06:55 AM
Hi Randy,
Oh - one thing I forgot - all my loco's are intended to be driven from the [5] and [Shift 5] "Passenger" views - spin the two traditional "Headout" views backwards to look at the train - that way you have all four quadrants covered a mere key press away and you get the relative motion of your head to the train - in all four views. This adds GREATLY to the immersion factor for me. You may have to adjust the [5] and [Shift 5] views forward and back with the [Page Up] [Page Down] keys as the position changes with focal view set - I'm running at 26 FOV.
Regards,
Scott
#15
- Vice President
-
- Group: Posts: Elite Member
- Posts: 2,225
- Joined: 19-December 09
- Gender:Male
- Location:South of here
- Simulator:ORMG
-
Country:
Posted 02 October 2021 - 08:47 AM
Hi Scott,
Thanks.
I use PaintDotNet and the only way to go is layers. Layers upon layers.
I don't know any other way to go about painting something like this. https://i.imgur.com/9fRArXl.jpg
https://i.imgur.com/C0xeeANh.jpg
Thanks again for the loco.
Randy
Thanks.
I use PaintDotNet and the only way to go is layers. Layers upon layers.
I don't know any other way to go about painting something like this. https://i.imgur.com/9fRArXl.jpg
https://i.imgur.com/C0xeeANh.jpg
Thanks again for the loco.
Randy
#16
- Vice President
-
- Group: Posts: Elite Member
- Posts: 2,225
- Joined: 19-December 09
- Gender:Male
- Location:South of here
- Simulator:ORMG
-
Country:
Posted 09 October 2021 - 02:15 PM
Caboose hop headed home.
https://i.imgur.com/qGw4nwz.jpg
https://i.imgur.com/qGw4nwz.jpg
#17
- Vice President
-
- Group: Posts: Elite Member
- Posts: 2,225
- Joined: 19-December 09
- Gender:Male
- Location:South of here
- Simulator:ORMG
-
Country:
Posted 11 October 2021 - 02:18 PM
New logo showed up on the diesels today.
https://i.imgur.com/XKMGSxE.jpg
https://i.imgur.com/XKMGSxE.jpg
#18
- Vice President
-
- Group: Posts: Elite Member
- Posts: 2,225
- Joined: 19-December 09
- Gender:Male
- Location:South of here
- Simulator:ORMG
-
Country:
Posted 16 October 2021 - 01:02 PM
https://i.imgur.com/F6dL6yS.jpg
#19
- Vice President
-
- Group: Posts: Elite Member
- Posts: 2,225
- Joined: 19-December 09
- Gender:Male
- Location:South of here
- Simulator:ORMG
-
Country:
Posted 16 October 2021 - 01:09 PM
https://i.imgur.com/joPxv4M.jpg
#20
- Vice President
-
- Group: Posts: Elite Member
- Posts: 2,225
- Joined: 19-December 09
- Gender:Male
- Location:South of here
- Simulator:ORMG
-
Country:
Posted 21 October 2021 - 06:02 AM
Scott,
Thanks for the reminder, I plumb forgot about those boxcars.
https://i.imgur.com/IykEnOH.jpg
Man, I need to redo that waycar.
Thanks for the reminder, I plumb forgot about those boxcars.
https://i.imgur.com/IykEnOH.jpg
Man, I need to redo that waycar.
#21
- Executive Vice President
-
- Group: Status: First Class
- Posts: 3,187
- Joined: 06-July 09
- Gender:Male
- Location:Downeast Maine (soon)
- Simulator:ORTS
-
Country:
Posted 21 October 2021 - 07:25 AM
 steved, on 21 October 2021 - 06:02 AM, said:
Scott,
Thanks for the reminder, I plumb forgot about those boxcars.
Man, I need to redo that waycar.
Thanks for the reminder, I plumb forgot about those boxcars.
Man, I need to redo that waycar.
Hi Randy,
Looks sharp - perhaps I should add some 3D details to the side - I had envisioned some photo skinners taking a stab at this - so I left the sides clean like the Goss car.
That's some custom weathering too - hah - nice. You've got an eye for this.
Regards,
Scott
#22
- Vice President
-
- Group: Posts: Elite Member
- Posts: 2,225
- Joined: 19-December 09
- Gender:Male
- Location:South of here
- Simulator:ORMG
-
Country:
Posted 21 October 2021 - 09:43 AM
Thanks Scott, the double sheath was easy. Lends itself well to custom lettering.
Now to tackle the outside braced model. Not a lot of open space between braces.
And the waycar needed more dirt.
https://i.imgur.com/Owok5fD.jpg
Dirt makes everything better.
Now to tackle the outside braced model. Not a lot of open space between braces.
And the waycar needed more dirt.
https://i.imgur.com/Owok5fD.jpg
Dirt makes everything better.
#23
- Conductor
-
- Group: Posts: Active Member
- Posts: 304
- Joined: 11-June 07
- Gender:Male
- Location:Great Barrier Reef
- Simulator:MSTS
-
Country:

Posted 21 October 2021 - 03:51 PM
G'day Steve,
I was so impressed with your re do of the VSL route I thought I would take up an Aussie feel to it.
I look forward to seeing more of your developments. I'd really like to do a similar US style/timeline as yours.
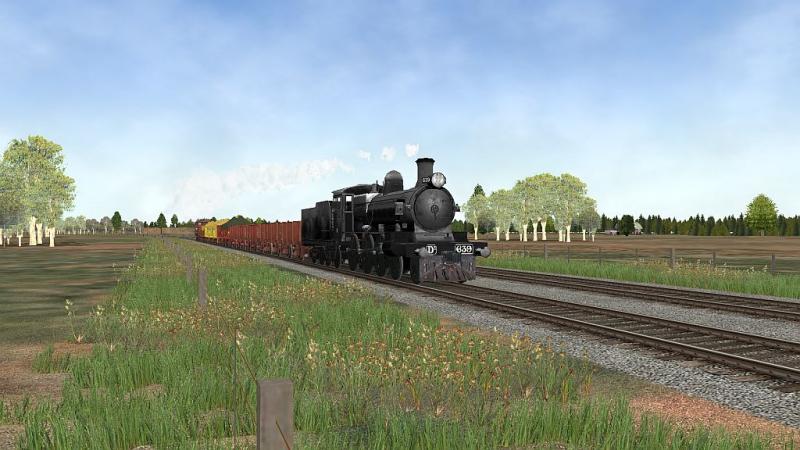
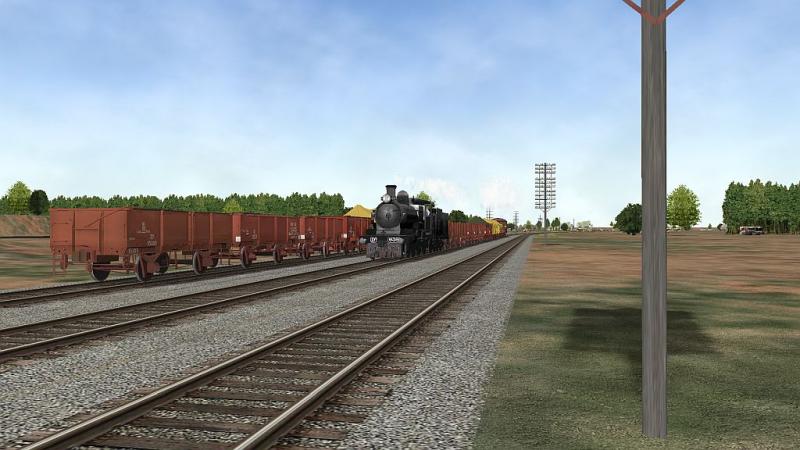
Cheers
Damo
I was so impressed with your re do of the VSL route I thought I would take up an Aussie feel to it.
I look forward to seeing more of your developments. I'd really like to do a similar US style/timeline as yours.
Cheers
Damo
#24
- Vice President
-
- Group: Posts: Elite Member
- Posts: 2,225
- Joined: 19-December 09
- Gender:Male
- Location:South of here
- Simulator:ORMG
-
Country:
Posted 22 October 2021 - 08:01 AM
Damo,
The whole thing has about 15 miles of mainline track so it's easy to super detail without feeling overwhelmed. It's flat so it's easy to add or move track and roads.
I started using it as a test bed for TSRE. Soon I had so much done that I made it my main route. According to the readme that came with it I can do whatever I want with it so it's mine. http://www.elvastower.com/forums/public/style_emoticons/default/rolleyes.gif
Almost all of the scenery items were default so I just deleted them and dropped links to my master shapes and textures folders in the route folder. Took about ten minutes.
https://i.imgur.com/xcYptcP.jpgFun fact, if you plug the coordinates into Google Maps it takes you to the Georgetown Loop in Colorado.
Looks like someone started the "Loop" and gave up.
Don't know who it was but thank you.
This is the model railroad I never had enough time, money or space for and now that I'm semi retired I'm having a blast with it.
Thanks for tuning in.
Randy
#25
- Vice President
-
- Group: Posts: Elite Member
- Posts: 2,225
- Joined: 19-December 09
- Gender:Male
- Location:South of here
- Simulator:ORMG
-
Country:
Posted 27 October 2021 - 11:39 AM
New town, new depot.
Tis still a work in progress. That green and yellow thing is a measuring stick that Dave included in his excellent Siskiyou route.
https://i.imgur.com/COkyNAm.jpg
In the beginning.
https://i.imgur.com/NmeGYODl.jpg
Thanks Andre.
Randy
Tis still a work in progress. That green and yellow thing is a measuring stick that Dave included in his excellent Siskiyou route.
https://i.imgur.com/COkyNAm.jpg
In the beginning.
https://i.imgur.com/NmeGYODl.jpg
Thanks Andre.
Randy