Elvas Tower: New rail system - Elvas Tower

Jump to content

  • 12 Pages +
  • « First
  • 7
  • 8
  • 9
  • 10
  • 11
  • Last »
  • You cannot start a new topic
  • You cannot reply to this topic

New rail system Rate Topic: -----

#81 User is offline   ErickC 

  • Superintendant
  • Group: Status: Elite Member
  • Posts: 1,001
  • Joined: 18-July 17
  • Gender:Male
  • Location:Hastings, MN, US
  • Simulator:ORTS
  • Country:

Posted 18 January 2021 - 08:19 PM

Gotcha. I could probably figure it out, but I'd need a route with a start point that is close to a known section of dynamic track to test on. Route builders are being really spartan with where you can start a train these days, so that's an annoying limitation. Also, route builders, take note: you should probably have a start point at every major location.

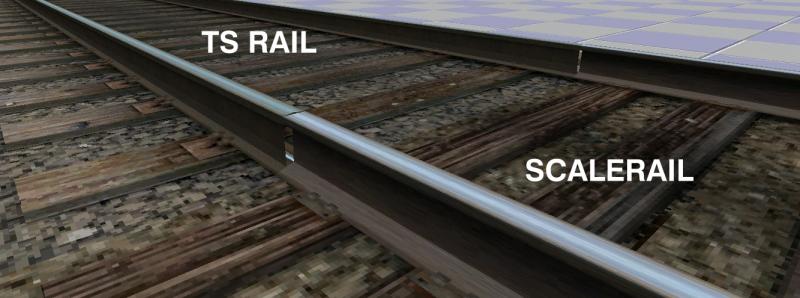
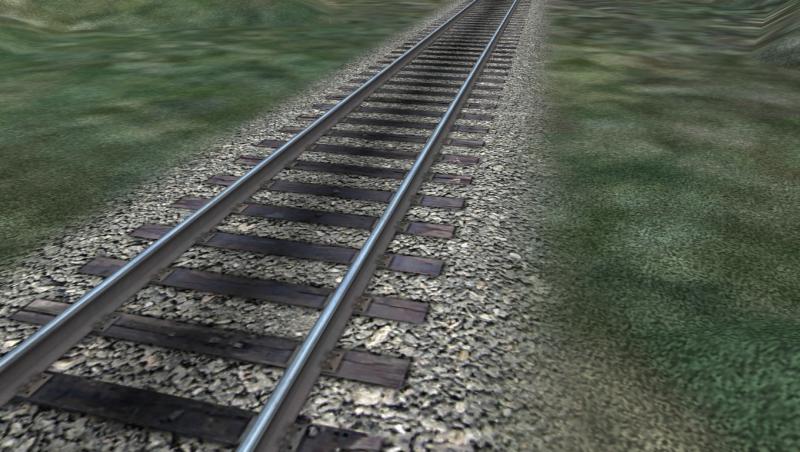
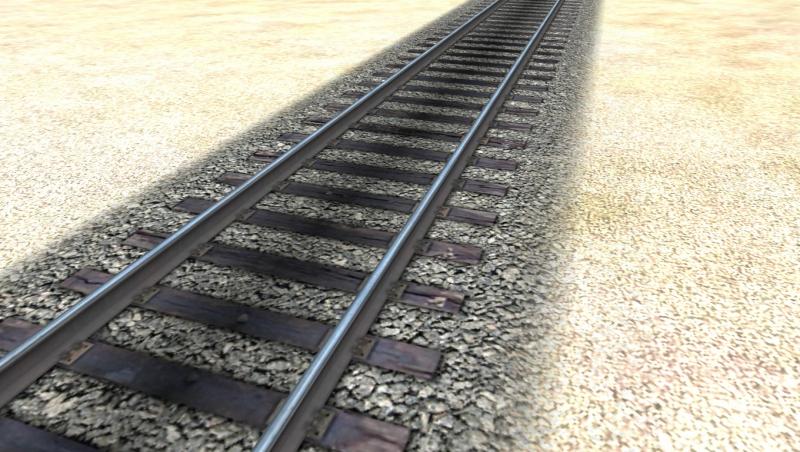
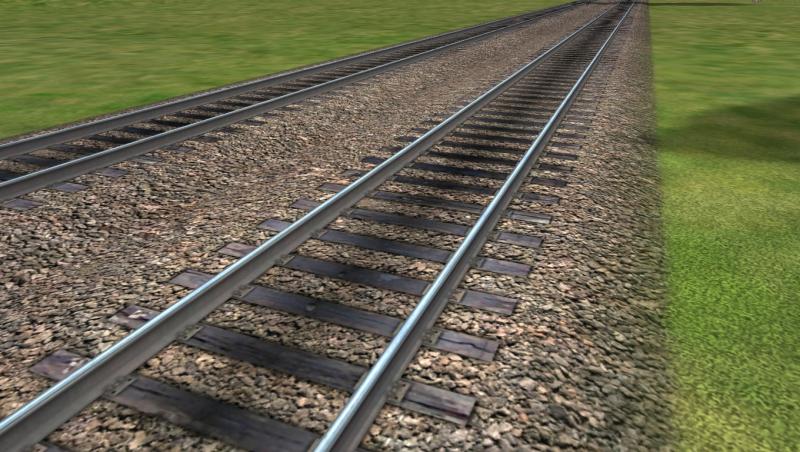
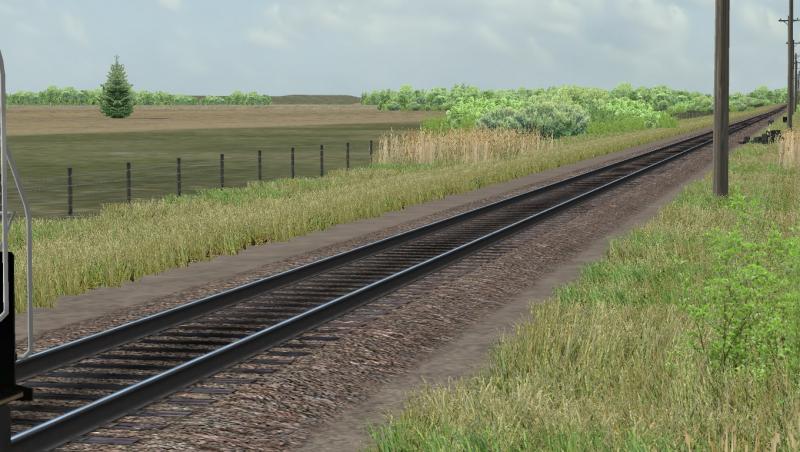
I think there are a few people we could ask about building switches, Marc might have some insight for us, for example. I noticed that Mullan has a brand new track system, so maybe someone at TS could give us some tips as well. As far as the ballast goes, I have a plan for that:

Attached Image: 36.JPG

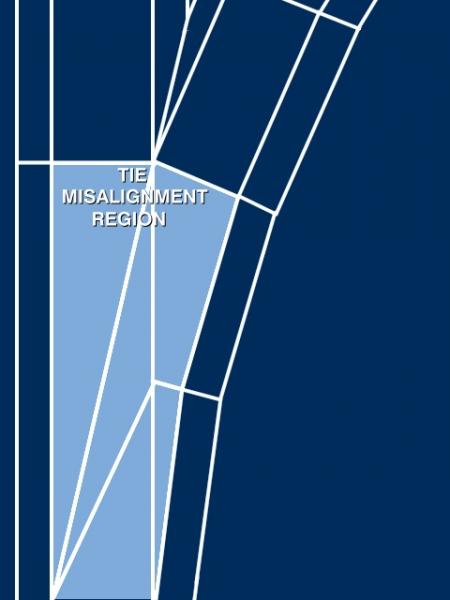
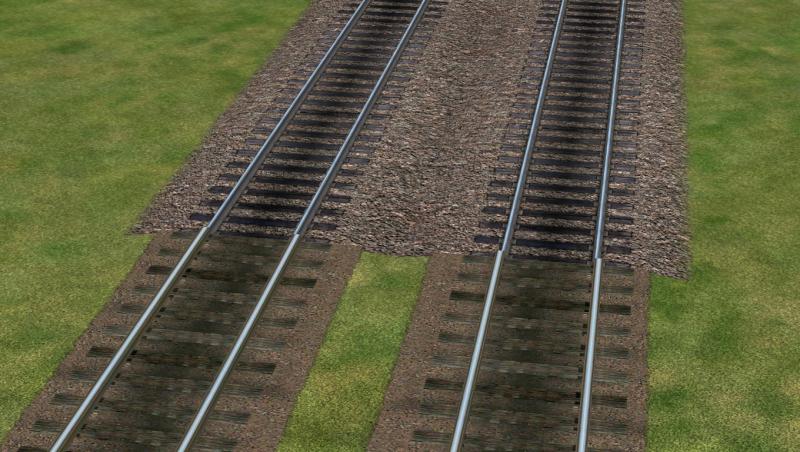
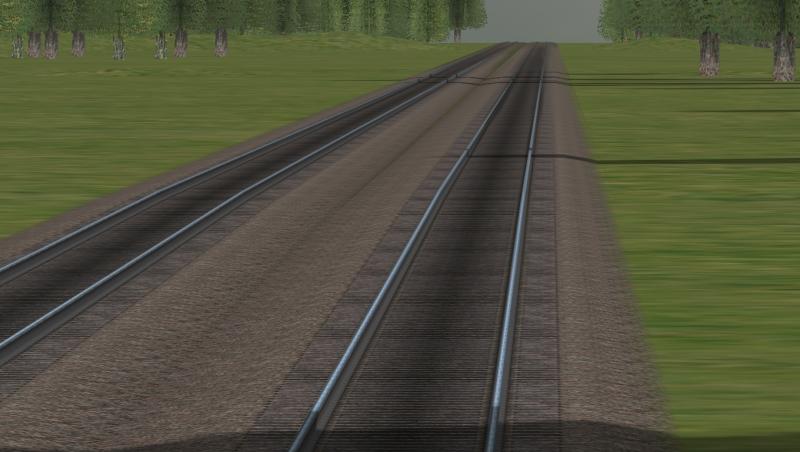
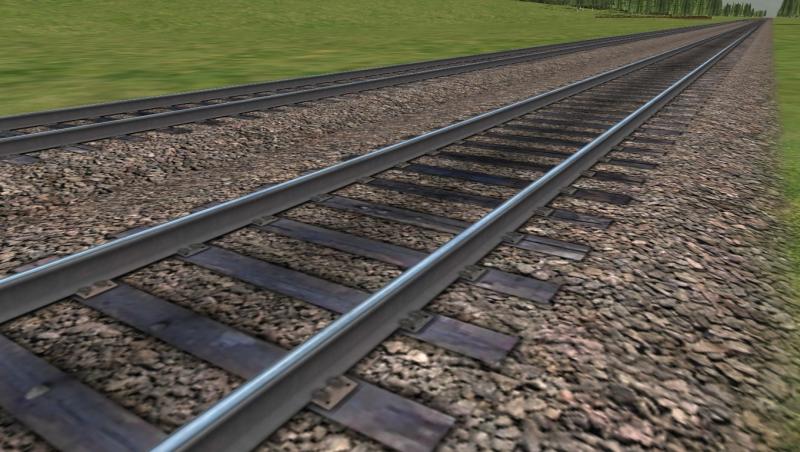
The light shaded region is where ties may not necessarily match up. The original plan was to cut the tie layers in this region and then build new ties from simple flat polys, but this introduces the problem of the ballast layer shading not matching up with the tie placement, and, of course, the new profile lacks a tie layer. The original Kuju rails dealt with the problem by ignoring it and letting the tie misalignment be, so maybe that's the path forward for us. We need to ask ourselves if our Kuju rail replacement (as opposed to a new hi-def system) needs to be perfect, or if done is good enough. For me, just having rails that are less than a yard thick is good enough for the most part, but there are other things we can do. For example, I could dedicate the unused right side of the texture to an alternate ballast center section that has shading for the rails, but no ties. We could assign that to the center of the tie misalignment region and then build ties with flat polys, adding another layer for the tieplates and spikes. I've decided against the idea of having two ballast profiles selectable by alpha, so there's lots of space on the map for this.

#82 User is offline   scottb613 

  • Vice President
  • Group: Status: First Class
  • Posts: 2,973
  • Joined: 06-July 09
  • Gender:Male
  • Location:Downeast Maine (soon)
  • Simulator:ORTS
  • Country:

Posted 19 January 2021 - 03:38 AM

Hi Folks,

I think - Mullen uses scale rail or some variant - no ? All the track pieces seem to be labeled SR. They also have a raised part of the shape for the ties on Mullen.

I was just messing with creating a new track texture last week - for the default track - much to my chagrin I found the texture mappings are a mess - I was trying to shadow the rail on the texture as that adds a great deal of pop - if you get the shadow aligned perfectly under the rail on one section - the next piece has it way off - some grossly so. Hopefully any new track system will be able to do this.

After decades of modeling - I was trying to figure out how I would model precise track sections as needed for a rail system - I can't think of a way to do this with precision in 3DC - hopefully you have better tools.

Regards,
Scott

#83 User is offline   ErickC 

  • Superintendant
  • Group: Status: Elite Member
  • Posts: 1,001
  • Joined: 18-July 17
  • Gender:Male
  • Location:Hastings, MN, US
  • Simulator:ORTS
  • Country:

Posted 22 January 2021 - 07:59 PM

Unless it's a special version, it's definitely not Scalerail. The profiles are totally different:

Attached Image: compare.JPG

Anyway, I have made several refinements:

  • Removed old items from the textures that were no longer necessary, like the separate tie layer
  • Redid the shadows on the ballast layer
  • Used a public domain photo to replace the ballast. The original texture was a composite of several photos I took of a gravel playground surface, and it was such a small area that the blending between different portions of the photo resulted in bands of dark and light areas that made the looping of the texture obvious
  • The bottom, flared portion of the rail had its texture widened so that it was the same resolution, width-wise, as the rest of the rail. It was originally mapped only from the side, so it was a little compressed. Now the spikes, which are part of the rail texture, look much better.
  • Refined the alpha channel to blend the ballast in a bit better


Here it is on a dark base (North Coast Railroad):

Attached Image: 37.JPG

Here it is on a light base (Carrizo Gorge v2.0):

Attached Image: 38.JPG

The whole right side of the texture is now free. I will be placing a clone of the ballast layer there that lacks ties or any edge blending. I will be able to use the tie-less sections for the middle of switches, where the ties will be flat polys (maybe - it might be acceptable without the extra work), and the unblended edges will be used for multi-track sections so there's a continuous layer of roadbed (no longer will multi-track sections look like Kato Unitrack).

I have attached the current 500m test section:

Attached File  a1t500mStrt.zip (1.56MB)
Number of downloads: 232

If this meets everyone's approval, I will then create the prototypes for the multi-track and tunnel sections. When the profiles are all ready, my intent is then to start with just the 170 default track pieces before moving on to the bazillion XTracks sections.

#84 User is offline   Genma Saotome 

  • Owner Emeritus and Admin
  • PipPipPipPipPipPipPipPipPipPipPipPipPip
  • Group: ET Admin
  • Posts: 15,350
  • Joined: 11-January 04
  • Gender:Male
  • Location:United States
  • Simulator:Open Rails
  • Country:

Posted 22 January 2021 - 08:39 PM

Q: is the ballast a different texture from the ties and rail?

It would be vastly easier to come up with alternative stone if it is on its own.

#85 User is offline   ErickC 

  • Superintendant
  • Group: Status: Elite Member
  • Posts: 1,001
  • Joined: 18-July 17
  • Gender:Male
  • Location:Hastings, MN, US
  • Simulator:ORTS
  • Country:

Posted 22 January 2021 - 09:09 PM

On the shape? No. On the master textures, which I will be uploading with the source files? Yes. You can just drop in whatever ballast texture you want, and so long as it's behind the shading, everything will just work.

#86 User is offline   ErickC 

  • Superintendant
  • Group: Status: Elite Member
  • Posts: 1,001
  • Joined: 18-July 17
  • Gender:Male
  • Location:Hastings, MN, US
  • Simulator:ORTS
  • Country:

Posted 23 January 2021 - 10:56 AM

Testing double track prototype section:

Attached Image: 42.JPG

Attached Image: 43.JPG

Attached Image: 44.JPG

Attached Image: 45.JPG

Attached Image: 46.JPG

And testing on a route with a gravel layer (CN Blackfoot v2):

Attached Image: 48.JPG

Attached Image: 49.JPG

#87 User is offline   ErickC 

  • Superintendant
  • Group: Status: Elite Member
  • Posts: 1,001
  • Joined: 18-July 17
  • Gender:Male
  • Location:Hastings, MN, US
  • Simulator:ORTS
  • Country:

Posted 23 January 2021 - 11:12 AM

After adding mipmaps to the texture, it becomes apparent I need to adjust the position of the solid roadbed layer used between tracks, as the reduced resolution in the alpha channel with distance is causing issues in both the solid between-track layer and the blended edge-of-track layer:

Attached Image: 50.JPG

#88 User is offline   eric from trainsim 

  • Waste Disposal Engineer
  • Group: Private - Open Rails Developer
  • Posts: 1,577
  • Joined: 30-October 10
  • Gender:Male
  • Simulator:ORTS
  • Country:

Posted 23 January 2021 - 12:06 PM

I'd remove the ballast. That's what I did my Scalerail textures, and I place a ballasts berm underneath based on the routes needs.

Marc has been working on new Scalerail tracks and roads, so its entirely possible Mullen has some of those. I know Cheyenne did.

#89 User is offline   ErickC 

  • Superintendant
  • Group: Status: Elite Member
  • Posts: 1,001
  • Joined: 18-July 17
  • Gender:Male
  • Location:Hastings, MN, US
  • Simulator:ORTS
  • Country:

Posted 23 January 2021 - 01:20 PM

Because I'll be distributing layered PSD and XCF files for the master textures, removing the ballast will be a simple process for the end user. The steps would be:

  • Remove the white layer in the alpha master textures for the ballast. The base image is black, so this will set a transparent base.
  • Copy the tie layer from the main master textures and paste it in the same position in the alpha master. Recolour this layer white. This will make the ties visible.
  • Repeat for the tie shadow layer and the rail shadow layer. This will ensure that anything below will be properly shaded.
  • Recolour the ballast layer on the main master black. This will make the shadows black.
  • Export the final image in TGATool or AceIt or directly to DDS as you normally would.
  • The end result will look consistent with the basic ballast layer despite being able to use whatever ballast shape you like.


Anyway, the more I plan ahead for switches, the more tie plates become potentially problematic, and having half of the spike on the base texture and the other half on the rail made no sense, so I combined the flared portion of the rail with the tie plate area:

Attached Image: 51.JPG

I think that the next step, however, is going to be doubling the size of the image. This will serve a couple of purposes:

  • Lengthening the total area before the texture loops will make the looping less obvious as there can be more tie variety in a longer area.
  • This creates a lot of extra space on the right side of the image for the tunnel wall textures and other potential track parts, ensuring that no section of track will be more than two drawcalls.


#90 User is offline   conductorchris 

  • Vice President
  • Group: Status: First Class
  • Posts: 2,345
  • Joined: 24-March 10
  • Gender:Male
  • Simulator:Open Rails - MSTS
  • Country:

Posted 23 January 2021 - 04:07 PM

Erick, you're work is looking *really* good!
Christopher

  • 12 Pages +
  • « First
  • 7
  • 8
  • 9
  • 10
  • 11
  • Last »
  • You cannot start a new topic
  • You cannot reply to this topic

1 User(s) are reading this topic
0 members, 1 guests, 0 anonymous users